|
The Info pane, just like its counterpart in the Finder, displays additional information about a selected document or group, from icon and name to comments and other metadata. Open the Info pane by selecting
Tools > Inspector > Info > ….
|
Note:
When you have multiple items selected, some editable attributes can be modified. For example, tags can be applied to multiple files at once. However, if you add tags to the same files separately, only tags common to them will be shown if you select them together again.
|
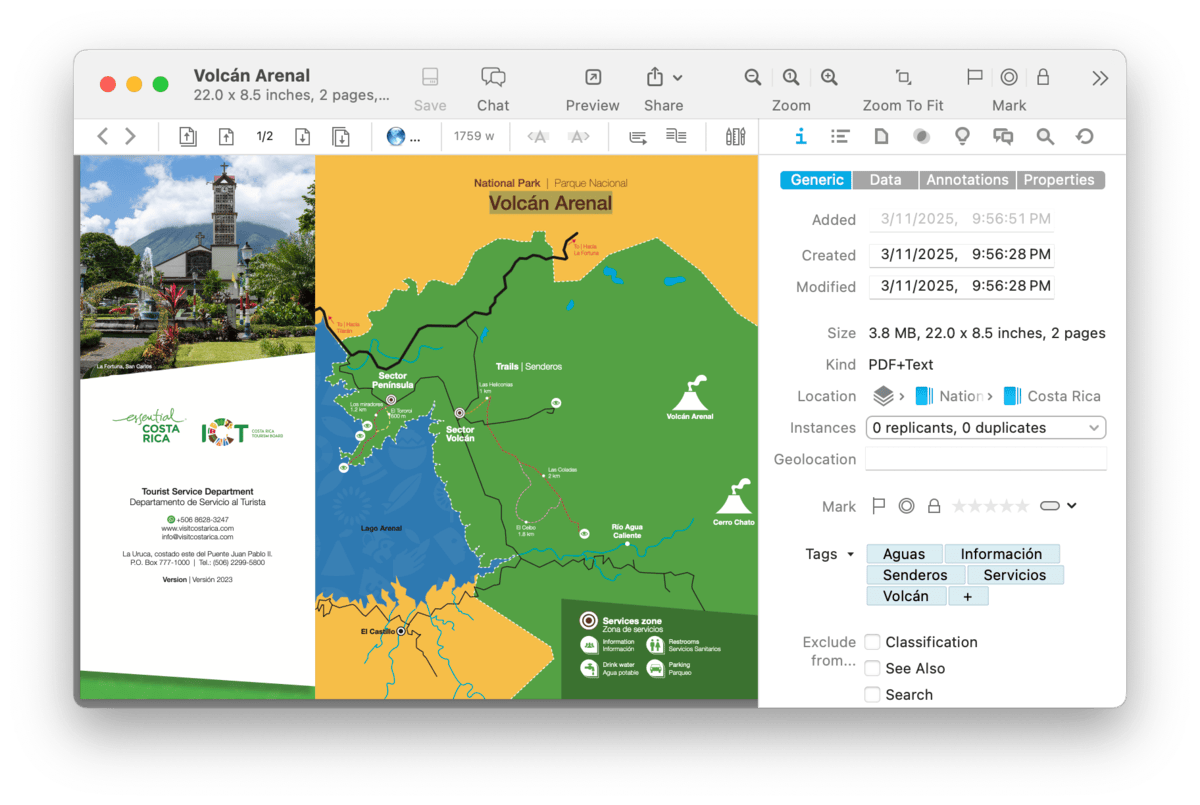
Generic
The Generic view shows additional basic information about a selected document or group, similar to what is shown in the Get Info window in the Finder. Additionally, it shows some other attributes like ratings, color labels, and geolocation data. Here are the attributes shown:
-

Icon and Name: Displays the name of the selected item. To change the icon of the item, select it and paste any image you want over it. To change the name of the item, use the Name field below.
-
Name: Displays the name of the selected item. This is an editable attribute.
-
Original: Displays the name of a document as it was originally imported or created. This cannot be changed.
-
Aliases: Displays any aliases for the selected item. Enter one or more words here, separated by semicolons, as alternative targets for Wiki links. Generally, Wiki links refer to the name of contents, and aliases make this system even more flexible.
-
URL: Displays a URL associated with the selected item. This is an editable attribute. While it is typically used for web addresses, it also may contain other types; e.g., file URLs, URL with custom schemes, etc. Click the down arrow and choose: Launch to open the URL, Copy to copy the URL to the clipboard, or Remove to clear the URL.
-
Path: Displays the item's file's path in the Finder. This is not an editable attribute. Click the down arrow and choose: Launch to open the file in the system default application; Show in Finder to open a Finder window with the file selected, and Copy to copy the file path to the clipboard. If you are indexing files, there is a Path option that allows you to select a folder or volume. If you have moved indexed files to a new location, this option can be used to select the new location, provided you have not renamed any of the files before updating the path.
-
Attached Script: Displays the name of a triggered script that runs when you select the item in the database. Click the down arrow and choose: Select to choose a triggered script to attach, or Remove to remove the script from the item.
-
Added: Displays the date an item was added to the database. This is not an editable attribute.
-
Created/Modified: Displays the date an item was created or modified. These are editable attributes. Click the calendar icon to choose a date and time. You can also select individual parts of the date or time and type or modify them with the up and down arrows. When typing, press the ⇥Tab key to commit the change.
-
Size: Displays the size of the item. For groups and news feeds, this field shows the size of all contained items.
-
Kind: Displays the kind of the selected item. For documents, the file type will be shown, e.g., Markdown.
-
Location: Displays the location of the item in the database. This is an active item; hovering over items will display their full names and clicking them will navigate to the clicked group.
-
Instances: Displays how many duplicates or replicants of the selected item are in the database. Click to show a pop-up menu listing all instances and duplicates and their enclosing groups. Select any item to reveal it.
-
Format: For news feeds you can set the default format in which new articles are saved.
-
Color: Set a color for a selected tag. Click the title Color for options to clear or copy the color.
-
Geolocation: Displays geolocation data based on the creation origin of the file; i.e., the geographic location when the file was originally created. This is an editable attribute and can be changed if you'd like the location to be relative to something else, e.g., the site of a historic event.
-
Marks: Displays these attributes for the selected item: Flagged, Read, Locked, Rating, and Label.
-
Tags: Displays the tags applied to the current item. Click the + button to add a new tag. Tags will be suggested from the existing tags in the current database or from all database tags if the document is in the Global Inbox. Click an added tag to reveal the Tag group, or remove it from the selected item.
Exclude From…: These checkboxes allow you to exclude an item from being used in various ways. For example, you can exclude temporary groups from classification to increase the accuracy of the built-in artificial intelligence. You can exclude an item from these operations:
-
Classification: When enabled on a group, this will keep DEVONthink from suggesting or using the group as a possible filing location.
-
See Also: When enabled on any file, DEVONthink will not include it as an item potentially related to the current file.
-
Search: When enabled on any item, it will no longer appear in toolbar search results, smart groups, or smart rules.
-
-
Wiki Linking: When enabled on any item, it will not be detected by automatic WikiLinking, neither by name or alias.
PRO
Data
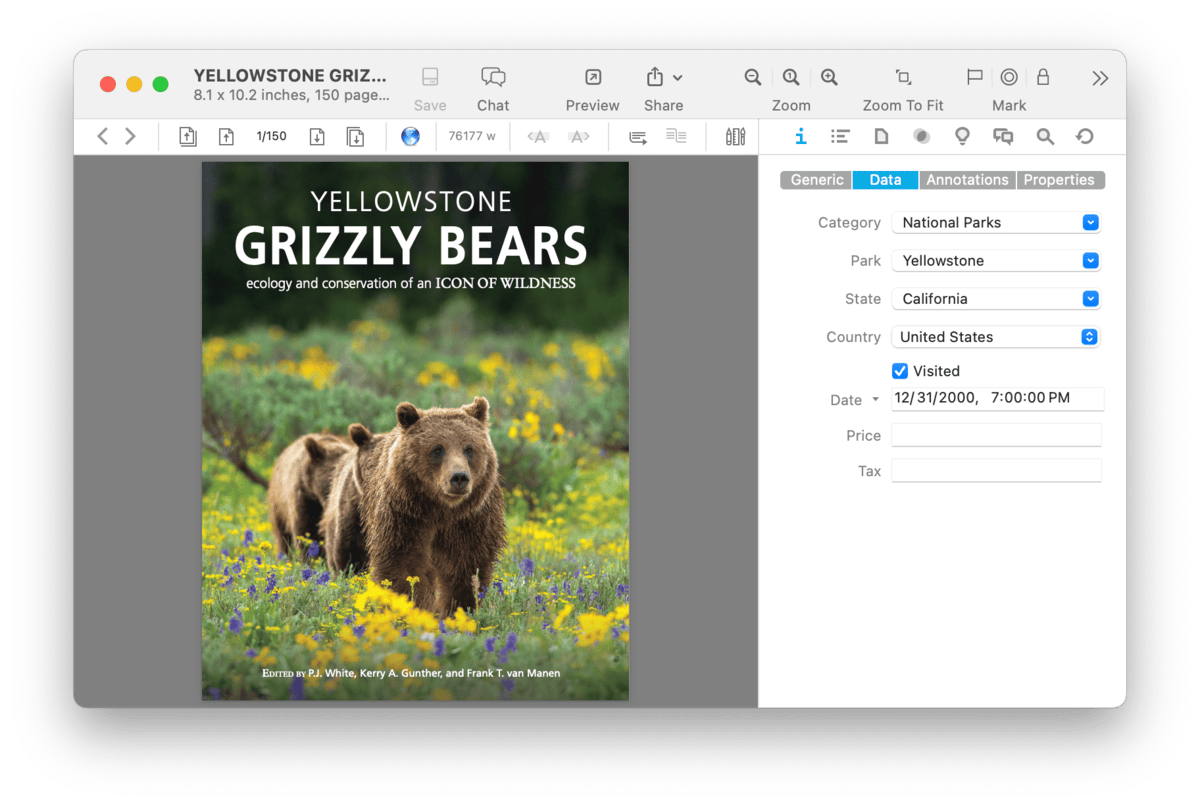
The Data view displays custom metadata fields and their values. These custom fields are defined by you in
Settings > Data. All available fields you have defined are shown in this pane. Note some fields may be specified as data types that include some extra actions in this view. For example, if you create a custom parameter with an Item Link data type, you will have an option to reveal the file.
-
Item Link: Click the down arrow and choose: Reveal to reveal the item in the database.
-
Single-line Text: Type in a value or click the dropdown menu to choose from a list you defined in the preferences .
-
URL: Click the down arrow and choose: Launch to open the URL or Copy to copy the URL to the clipboard.
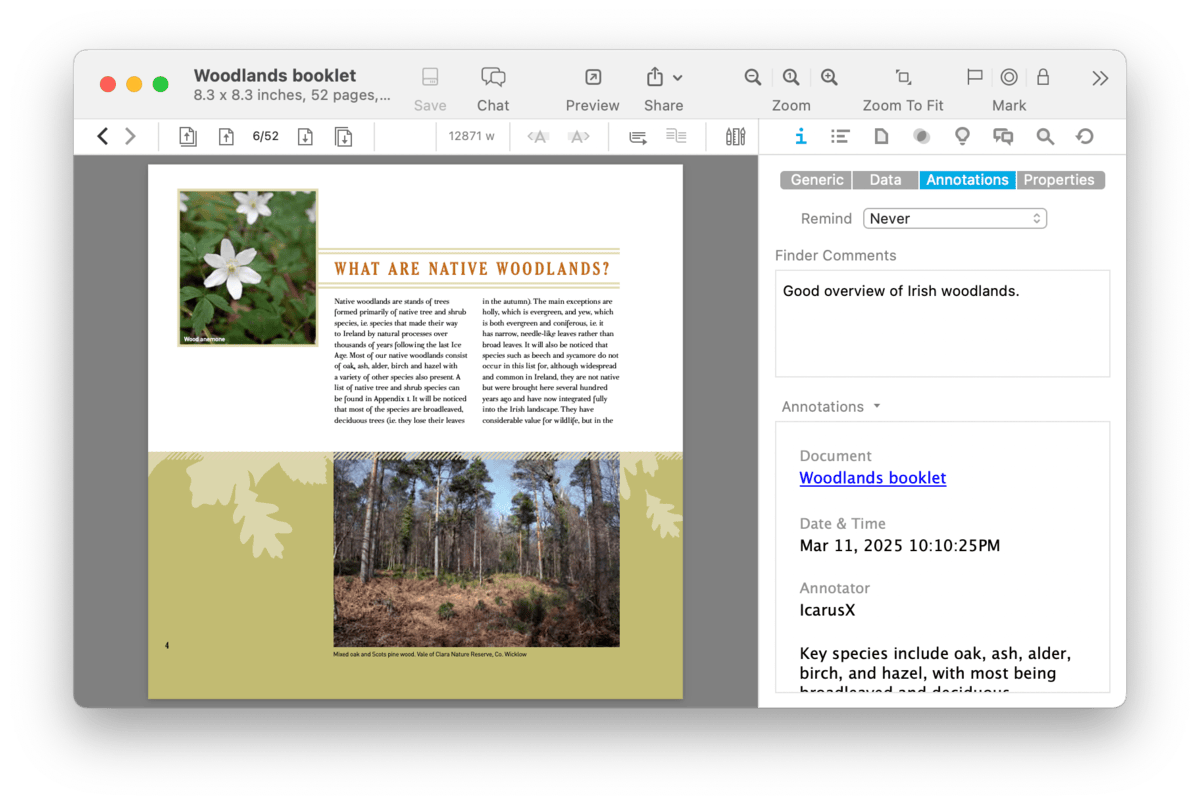
Annotations & Reminders
Reminders: While there are many reminder applications, including Apple's own Reminders, sometimes you just want to set a quick reminder for an item, or multiple items, in DEVONthink. The Reminders section allows you set a reminder, including recurring ones with optional alarms.
After choosing a schedule, set a date and time for the reminder or to begin a recurring reminder. For recurring alarms, the data or time you set will be the beginning of the alarms. Reminders can be set to:
-
Once: Only trigger an alarm once.
-
Hourly: Set an hourly reminder, triggering at the minutes of time you set, e.g, 10:15, 11:15, etc. Set an interval for how many hours should elapse before the next reminder, e.g., 4 for every four hours.
-
Daily: Set a daily reminder, triggering at the hour and minutes you set, e.g., daily at 9:35 AM. Set an interval for how many days should elapse before the next reminder, e.g., 2 for every other day.
-
Weekly: Set a weekly reminder, triggering at the hour and minutes you set. Choose a day of the week the reminder should trigger on. Set an interval for how many weeks should elapse before the next reminder, e.g., 3 for every third week.
-
Monthly: Set a monthly reminder, triggering at the hour and minutes you set, e.g., daily at 9:35 AM. Set an interval for how many months should elapse before the next reminder, e.g., 1 for every month. Choose Each and set which days of the month you want a reminder, e.g., the 1st and 15th of the month. Alternately, choose On the … to choose a regular interval like the second Thursday of the month.
-
Yearly: Set a yearly reminder, triggering at the hour and minutes you set, e.g., daily at 9:35 AM. Set an interval for how many years should elapse before the next reminder, e.g., 1 for every year. Choose which months you want a reminder. Also, choose On the … to choose a regular interval like the last day of those chosen month(s).
Alarm: Reminders are most useful when you have an alarm to, well, remind you of something. There are several alarms available for a reminder:
-
Bounce Dock Icon: Bounce the icon in the dock. This will only occur if DEVONthink is not the active application.
-
Display Notification: Displays a notification using the Notification Center, appearing at the upper right of your screen. The message shown can be a combination of static text and placeholder text. It defaults to the Name placeholder. Control-click and choose Insert Placeholder to add additional placeholders. Note System Settings > Notifications > DEVONthink must be enabled for this alarm to display. Notifications are also only shown when DEVONthink is not the frontmost application.
-
Display Alert: Displays an alert dialog when DEVONthink is or becomes the active application. If it's not frontmost, the dock icon will bounce until you switch to it. Like Display Notification, this contains static and placeholder text, and defaults to Name.
-
Speak Text: Using the Mac's speech synthesis, this alarm will speak the specified static and placeholder text.
-
Play Sound: Choose one of the system alert sounds found in System Settings > Sound > Sound Effects.
-
Send Mail With Item Link/Attachment: Enter email addresses to which to send the matching items. This can be a comma-delimited list of addresses, names, or enter the name of a group you've defined in your contacts. The email contents will contain either an item link to the selected file or it will attach the file itself.
-
Add to Reading List: Add the file to DEVONthink's Reading List.
-
Open: Open the document in an a DEVONthink document window.
-
Open Externally: Open the document in the system default application.
-
Launch URL: Opens the URL associated with the document, if present.
-
Execute External Script: Run a selected script. External scripts are stored in ~/Library/Application Scripts/com.devon-technologies.think/Reminders. Add your own scripts to this location to make them available for use with reminders.
-
Execute AppleScript/JavaScript: Run an ad-hoc script written for the current reminder. Press the … button to display a popup pre-populated with a core script in the chosen language. Edit this and press the compile button at the lower left. Embedded scripts are only available to the reminder in which they are created. If you want to use the same script with other reminders, consider using an external script instead.
As a bonus, reminder alarms will open databases containing the item when an alarm triggers.
|
Note:
When setting a reminder on multiple items, alarms are delivered individually. For example, an alert notification will show for each file, even if they were set for the same time.
|
If you are interested in the use of scripts in alarms, you can read more about them in the Reminder Scripts chapter of the Automation chapter.
Finder Comments: Similar to the Comments in the Get Info pane in the Finder, the Finder Comments field can be used to store miscellaneous bits of information about the selected objects.
|
Note:
These comments will not appear in the files in the Finder unless the files are indexed or exported from the database.
|
Annotation Files: This pane displays or allows you to create annotation files for a selected document. Annotation files are separate files where you can store notes about a specific document. These files can link back to the original file for quick access. Commonly used with PDF files, they can actually be used for making notes with any document in your database.
If an annotation file doesn't exist, you can make one with the commands from the down arrow in this section.
-
New from Template: Opens a submenu containing three options: Create an Annotation file from the default template, choose a custom template added to DEVONthink's internal Annotations folder, or open the Annotations folder to access any custom templates you've added.
-
New from Clipboard: Choose this option to create an annotation with content from the clipboard.
-
Open: Open the annotation file.
-
Reveal: Reveal the annotation file in its current location.
-
Insert Back Link: This inserts a back link to the original file into a new annotation file. If no annotation file exists, one will be created with this command.
-
Insert Still Image: Inserts a thumbnail from the currently viewed video associated with this annotation file. Playback must be paused to use this command. If you are using Markdown annotation files, we recommend you have enabled Import images to group in the
Files > Markdown settings to store the thumbnail as a linked file.
-
Insert Quote: This inserts both the selected text and a backlink to the page or paragraph in the original file. If no annotation file exists, one will be created with this command. This option is only supported by PDF, plain text, and rich text documents.
If an annotation file is detected by DEVONthink or you've just created one, an editable preview of the file will appear here. Clicking the down arrow reveals these options:
-
Insert Back Link: Insert a link back to the original document in the current annotation file. With audio and video files, the back link will include the current playback time. With multi-page PDFs, the back link will include the current page .
-
Insert Quote: Inserts selected text an a link to the current page.
-
Insert Summarized Annotations: Inserts a summary of the document's annotations, similar to what is produced via the
Tools > Summarize Annotations commands. The format of the summary is dependent on the format of the annotation file.
-
Export: Exports the current annotation file to the Finder in one of these formats: PDF, rich text, plain text, or Word (.doc) formats.
-
Remove: Moves the annotation file to the database's
Trash and removes the reference from the original document.
Settings: There are a few annotation-specific options in the
Files > General settings. Set whether annotation files are created in an shared Annotations group at the root of the database or in the same group as the referring document. Enable Move annotations automatically to have an annotation file "follow" the document it refers to if it moves to another database. And with Rename annotations automatically and Update name of items links in the
WikiLinks settings, renaming the referring document instantly changes the annotation file's name and the backlink text.
Creating an Annotation File: DEVONthink has a built-in default annotation file in rich text format, suitable for general use. However, you can create your own custom template in plain text, rich text, or Markdown formats. These files can be created externally and added to ~/Library/Application Support/DEVONthink 3/Annotations.noindex or created in DEVONthink and exported via
File > Export > as Template to the Annotations.noindex folder.
To create backlinks to the original file, there are two placeholders for use in the body of your template:
Rich Text: To create the backlink in a rich text template, use the %documentLink% placeholder and the document name will be added as the link's text.
Markdown: To create the backlink in a Markdown template, use the form: [%documentName%](%documentLink%).
Plain Text: Since plain text files don't support live links, you can use
WikiLinks to create a backlink. For example, if you are using the Square Brackets WikiLink syntax, you could use [[%documentName%]] in the body of the plain text.
Properties
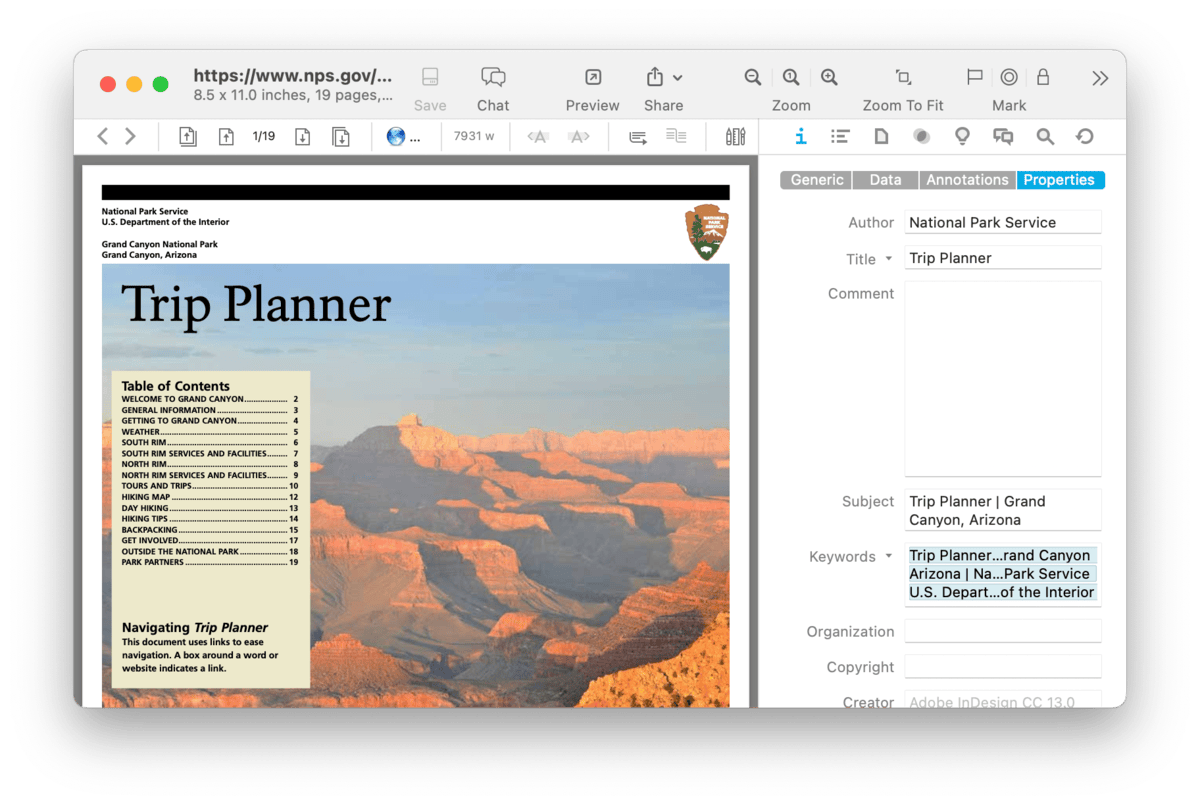
The Document Properties section gives you access to certain format-specific metadata. Supported formats are: RTF, PDF, audio or video with metadata, or images. This metadata can include some of the following:
-
Author
-
Company
-
Copyright
-
Title
-
Subject
-
Keywords
-
Comments
-
Organization
Depending on the document type, you may be able to edit or view these properties. More fields may be available depending on the document type.
There are two parameters supporting extra actions:
-
Click the Title button and select Copy, or select Set Name As to quickly change the document's name.
-
Click Keywords and choose Convert to Tags to apply the keywords as DEVONthink tags.
|