|
From setting up your default chat engine and deciding what kind of permissions you give it when searching or working with your Mac, the AI view is where you set these options. For creating AI-based images, see the Image Generation view. And if you need to detect or convert speech to text in images and media files, see the Transcription view.
Chat
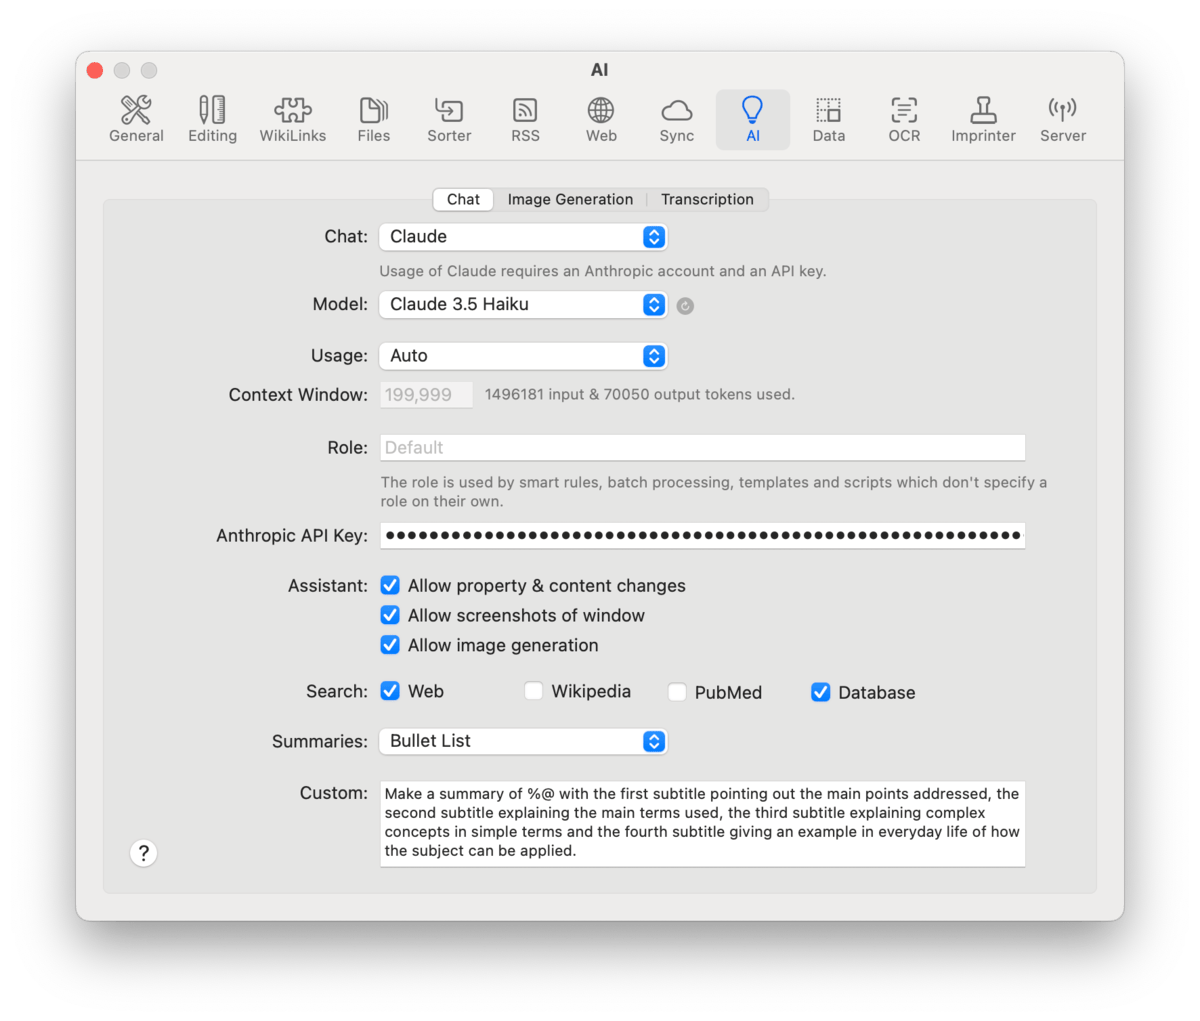
Choose your AI model and settings specific to it, as needed. Also set from where the model can get information, if it can effect changes to your database, and what kind of summaries you'd like it to return.
Chat Setup: Specify what large language model (LLM) you want to use and set up any required parameters for it. Note several of the controls here are dynamic and the options will change depending on what LLM you've chosen.
-

Chat: Choose from the list of supported chat engines, e.g, ChatGPT, Anthropic's Claude, or even one you are running locally.
-
Model: Choose from the list of models for a specific LLM, e.g., Gemini Flash 8B. Each model may show one of several icons showing its capabilities:  for reasoning,  for vision,  for tooling, and  for cost, with the icon's boldness indicating higher or lower costs.
-
Usage: Choose an option to balance cost and quality of results, from fewer tokens with less precision to more tokens but a higher chance of useful results.
-
Context Window: This is the number of tokens at a time the LLM can process and "remember" in a conversation. A larger context window means more data is passed or rememebered. However, if you're trying to run a local LLM, larger context windows use more RAM. This also displays how many tokens have been used, sending and receiving responses.
-
Role: Define an optional default "persona" or instructions for the AI, e.g., "You are an undergraduate professor presenting to your class. Use Markdown formatting with sections and subsections but no lists. Include links to your sources." This is used in automation, like AI assisted scripting.
-
API Key: Enter the personalized key you were provided by your AI service provider.
-
URL: Enter the URL of a locally running LLM server. This option will only appear as needed.
Assistant: Certain AI models have access to "tooling" and may be able to accept DEVONthink-related commands. You need to decide whether to allow it to perform certain behaviors on your Mac and with your databases.
-
Allow property & content changes: Decide whether the chat assistant can make changes to your database, e.g., add tags to a document or create a new one for you.
-
Allow screenshots of window: Allow the AI assistant to capture and examine a screen capture of DEVONthink's window for use in queries. Requires a compatible AI model, e.g, Claude Sonnet.
-
Allow image generation: Allows the AI assistant to create images, e.g., asking What does the Eiffel Tower look like? This utilizes the text-to-image engine chosen in the
AI > Images settings.
Search: Choose from where you would like the chat assistant to search for information: in your Databases, on the PubMed or Wikipedia websites, or on the Web, in general.
Summaries: Determine what summary format you'd like in response to asking chat to summarize a document. The choices are:
-
Text: Gives you a brief synopsis in a few paragraphs.
-
Bullet Points: Returns a list of the main points.
-
Key Points: Provide a distilled response of the main topics.
-
Table: Create a table of columns and rows, often used for correlating pages or links to text.
-
Custom: Provide a summary defined by a template you define.
If you're building a custom summary, there is a special placeholder that indicates the item being summarized: %@.
Custom: Create your own prompt defining what kind of response you'd like, including how you'd like the summary to be structured. Use
Image Generation
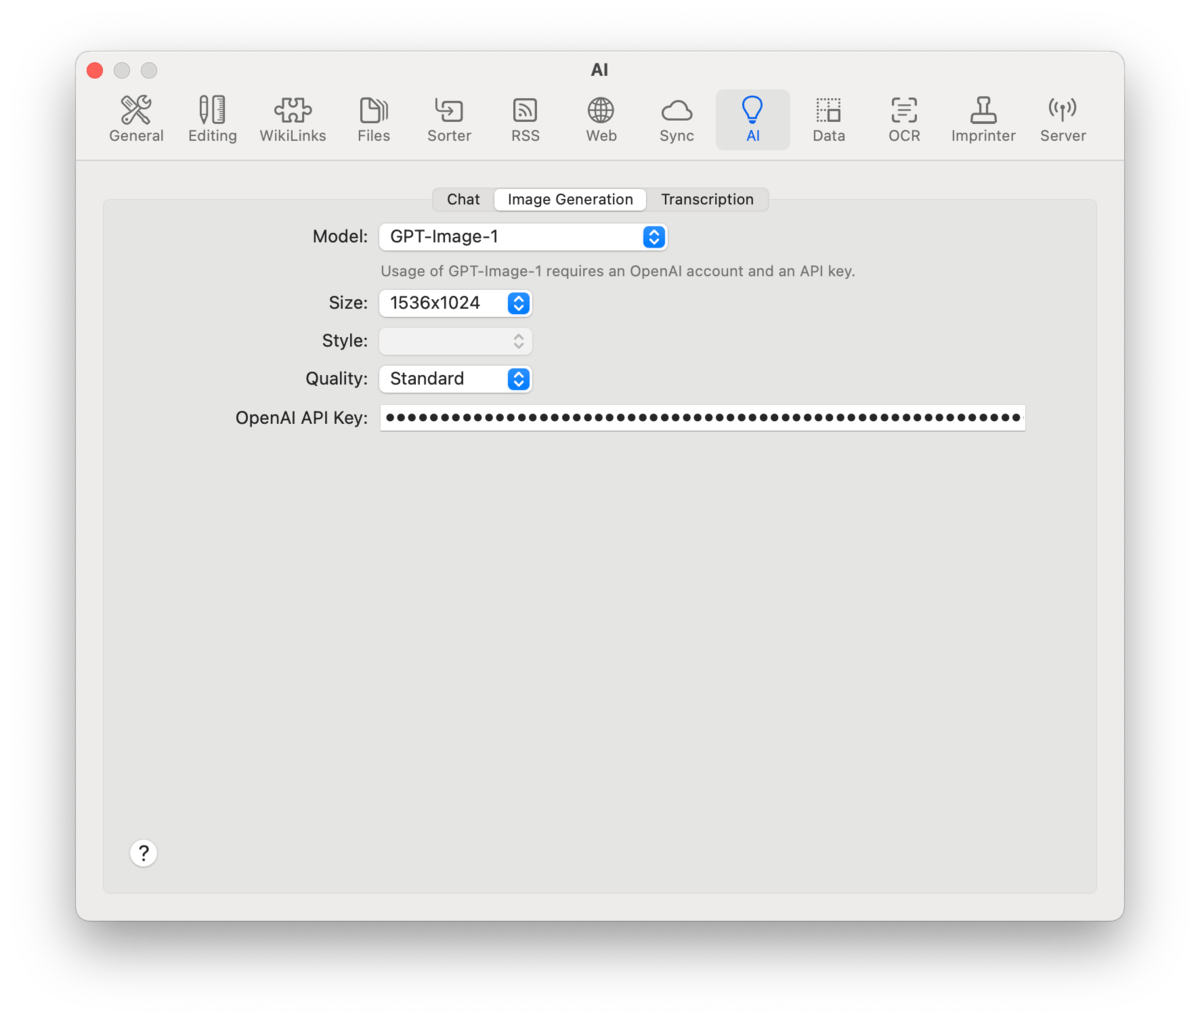
Choose and set up a text-to-image AI model. These controls are dynamic and their options change depending on the model choose.
-
Model: Choose a supported text-to-image model, e.g, DALL-E or Flux.
-
Size: Choose a predefined size for the images.
-
Style: Choose a predefined style, if applicable.
-
Quality: Decide whether to generate Standard or HD images, if available.
-
API Key: Enter the API key you received from the image generation provider, e.g., Replicate.com for the Flux generator.
Transcription
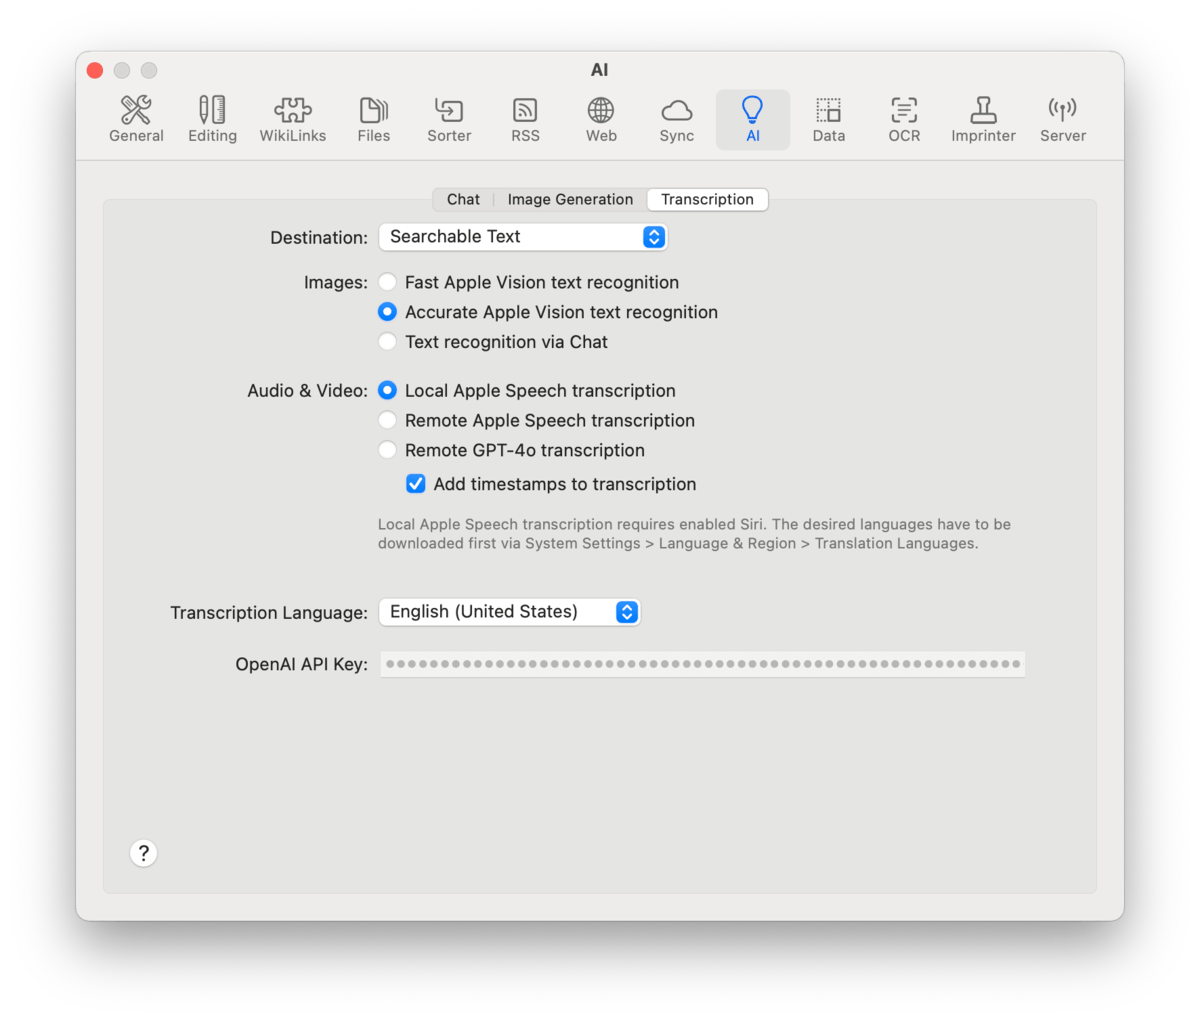
AI speech-to-text processes incoming media files and processes them per these settings. For example, an .mp3 file could be transcribed into a separate annotation file for future use.
Destination: Choose the type of output for the transcription:
-
Searchable Text: This is similar to Apple's Live Text feature in that a text layer isn't added to the document, but instead is stored in the database's index and associated with the file.
-
-
Comment: Add the transcribed text as a Finder comment on the file.
Images: Decide what live OCR engine you want to process images added to your database:
-
Fast Apple Vision text recognition: Quickly detect text in images using Apple's Vision framework. Often sufficient for many use cases.
-
Accurate Apple Vision text recognition: Detect text in images with an emphasis on accuracy over speed.
-
Text recognition via chat: Uses your chosen Chat model to detect text in images, provided the model supports image analysis.
Audio & Video: Choose the transcription engine you want to process media files added to your database.:
-
Local Apple Speech transcription: Transcribe audio on your Mac with Apple's Speech frameworks. May be less accurate and requires Siri or Dictation to be enabled on your Mac. However, you aren't required to share the information with Apple.
-
Remote Apple Speech transcription: Transcribe audio by sending the data to Apple's servers to be processed by their Speech framework.
-
Remote OpenAI Whisper transcription: Transcribe audio remotely with OpenAI's Whisper service.
Transcription Language: Choose the language of the media file to be transcribed. Only used with OpenAI's Whisper.
API Key: Enter the API key you received from your AI transcription provider, e.g., OpenAI.
|