|
|
|
Markdown Documents |
|
Markdown is a simple formatting language invented by John Gruber that has gained in popularity over the past few years. It allows you to write in plain text, using some easily learned control characters, to produce nicely rendered HTML output. With some styling and ingenuity, you can create a wide variety of documents. Markdown files can be imported or created via Data > New > Markdown text. Writing Markdown is essentially the same as writing plain text documents. As you're writing you can switch easily between a plain text editor and the rendered view or even view both simultaneously using the side-by-side view via the View > Document Display commands. Syntax Highlighting: When editing the source of the Markdown, DEVONthink's hybrid source rendering will display many types of formatting or elements as you type. For example, typing These types of formatting are shown in the syntax highlighted view, including CriticMarkup (see below): Formatting:
Elements:
Metadata: One of the features of MultiMarkdown is metadata headers. These allow you to add non-displaying information about the document, like authors, dates, and even linked stylesheets. To use the feature, format the first line of the document with a colon, e.g., Author: DEVONtechnologies. Add as many metadata fields as you wish but they must be in a block at the top of the document. If you would like the first line of your document to contain a colon, perhaps adding notes like Developer: A. Edwards and Re: OCR, just add a single blank line at the top of the document and the subsequent lines will be treated as normal paragraphs. You can learn more about Markdown and its syntax on Gruber's Markdown pages or the MultiMarkdown syntax guide. Linking You can reference local images, scripts, and other resources using item links, downward-relative (traveling subgroups; it's not possible to travel up with '..' as documents can have multiple parents) or absolute (start with a forward slash) paths. Here are examples of linking an image:
Linking Images: Regarding keeping track of your linked images, if you drag or paste images into a Markdown document, they will be imported into a group in the document's location if Preference > Files > Markdown > Import images to group is enabled. The group name is also assigned in the preferences, with the default name being Assets. This group will also contain images from web content clipped as Markdown documents if the above option is enabled. If you enter a name in the preferences mentioned above, this will create a subgroup in the location of the Markdown document and a relative link will be created in the Markdown document. If you add a name preceded by a forward slash, e.g., Drag and Drop/Copy and Paste: Drag and drop or copy and paste items into a Markdown document to add the appropriate links. Drag and drop documents while holding ⌘-⌥ will create a URL with an item link. Dropping an image will create a properly formatted Markdown image link. Drop WikiLinking: If you have enabled automatic
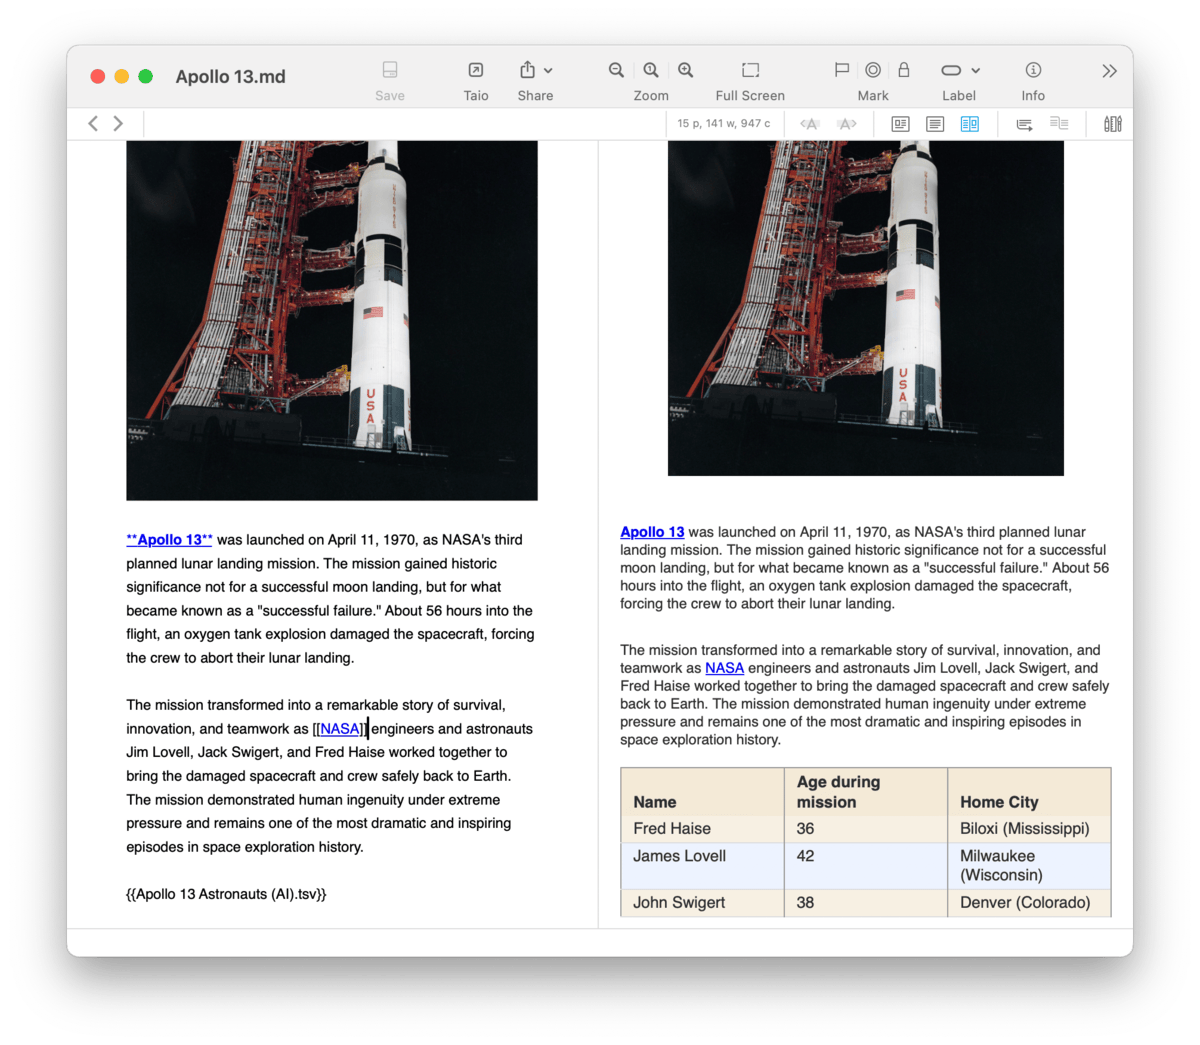
WikiLinks, links to documents can be detected as you write. If you have enabled Names & Aliases, links will appear as matches are detected. If you enabled Square Brackets, type Inserting Item Links: Another option for inserting links into Markdown documents, Control-click while editing and choose Insert > Item Link. Search for an item's name and insert a Markdown formatted link directly into the document. For images, just add an exclamation point before the link if you want it to display in the rendered document. File Transclusion: A special feature of DEVONthink's Markdown handling is support for file transclusion. This provides the capability of displaying the contents of one file inside the contents of a Markdown file. This supports displaying the contents of: plain text, rich text, HTML, formatted notes, sheet, or more commonly, other Markdown files. For example, you may have several chapters of a book written in individual Markdown files. Use transclusion to view them all as one document with out the need to merge or copy and paste the content between files, similar to some popular writing applications. If you examine the image at the top of this section, you will notice the table isn't a Markdown table at all. It's a transcluded sheet. To use transclusion, just enter the desired document's name or item link between double braces, e.g., Styling Styling your Markdown documents can be done with internal styling or externally referenced stylesheets. If you have a specific stylesheet you'd like to use globally, you can specify one in the Files > Markdown > Style Sheet. settings. If you're working on styling or creating different kinds of documents, here are options for in-document styling:
Markdown Extensions To support some features in Markdown that aren't built in, DEVONthink supports a handful of known and widely used extensions. The first option below requires no user interaction. The following three can be enabled in Settings > Files > Markdown, if desired. Highlighting, strikethrough, …: Text notations, e.g., for noting changes are sometimes necessary in documents. DEVONthink supports the features of the CriticMarkup extension of Markdown. It also supports a few alternate highlighting syntaxes, like ==text== and ^^text^^, found in some other Markdown-enabled applications. MathJax: Markdown is often used in academic situations, many using mathematical equations in their writing. DEVONthink supports the Mathjax extension that will beautifully render LaTeX coded equations in your Markdown documents. For more information on how MultiMarkdown handles equations, please see: Math support in MultiMarkdown. Mermaid: Diagrams can be created in Markdown documents using the Mermaid extension. Add a line of three backticks as shown Prism: For those writing code in their Markdown, DEVONthink supports Lea Verou's Prism extension. Just add a line of three backticks
Emoji: For a little extra personality, you can type Slack-style emoji, like Interface Navigation Bar: When working with Markdown documents, you can switch between Preview and Source modes. There also is a special icon Editing Bar: The Editing bar is only available when editing the source. It has a subset of the tools used in rich text editing, e.g., Highlight, Bold, etc. Inspectors: These inspectors provide navigation or a view into the resources in Markdown documents:
Context Menu: Markdown documents support the same context menu items available with text selections in the document source. But there are a few special commands available both in the source and preview:
Item Linking In addition to the document's standard item link, Markdown documents support this alternative item link:
Alternate item links are available in the context menu in the view/edit pane or when holding the Shift key while viewing the Edit menu. |
 present in the navigation bar. This switches to Side-by-Side mode, allowing you to edit and preview the current document in two side-by-side panes.