|
|
|
Going Paperless in DEVONthink |
|
Scanning is an integral part of many workflows, at home, on the road, or in the office. DEVONthink has built-in scanning controls to interface directly with your databases. Combined with the internal OCR, it makes for a much more efficient workflow. If you are using a Ricoh (Fujitsu) ScanSnap scanner, see the next section. Technical Considerations If you have a scanner or are shopping for one, you should check the details of the specific product. It should firstly be compatible with the version of macOS you're running. This is especially true if you're buying a used or older scanner. Secondly, and more importantly, make sure it supports Apple's Image Capture Architecture. Search for the scanner's downloadable drivers and look for
All of DEVONthink's internal scanning functions are done in the View > Import sidebar. Here we will look at simple step-by-step instructions for the types of scans you may need to do. So start by opening the Image Capture section. Single Page Scans
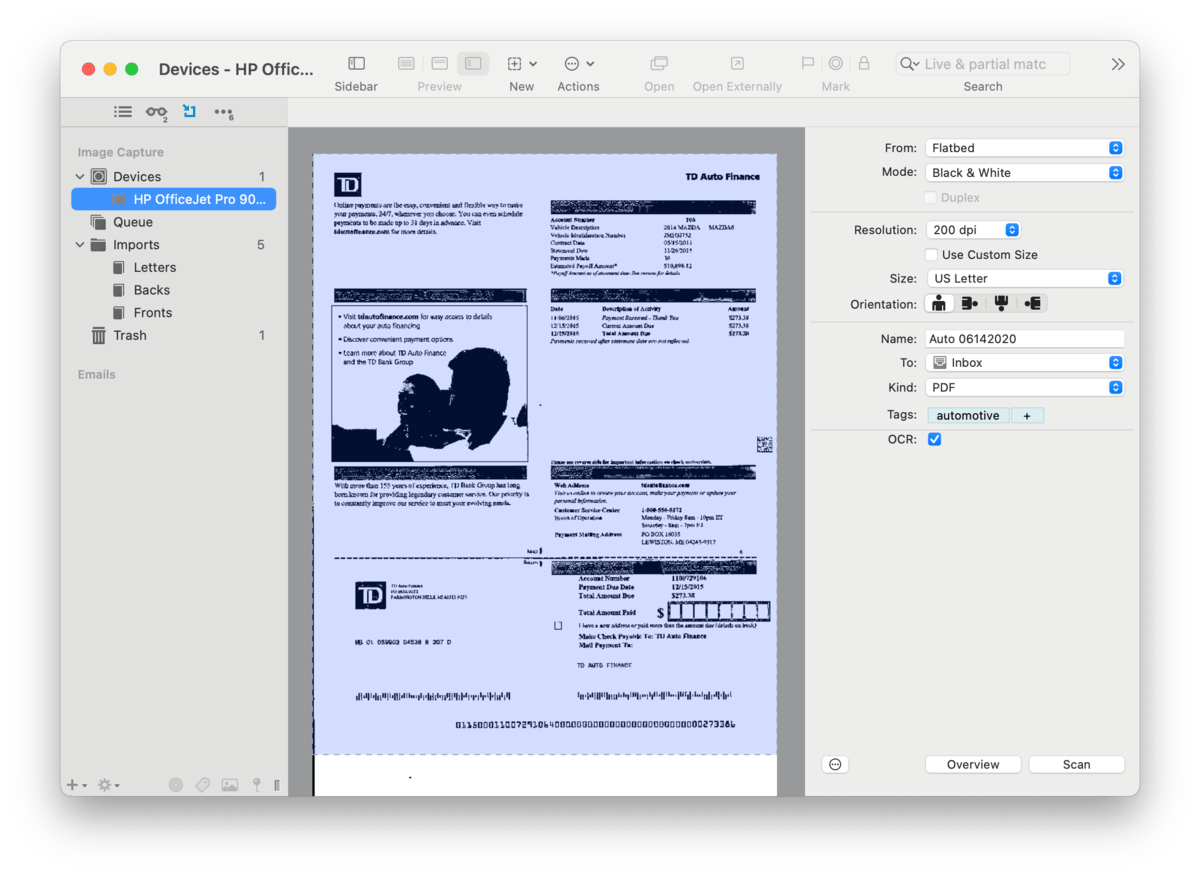
Single page single-sided documents are very common, e.g., receipts or invoices. Fortunately, they're also very quickly and easily scanned. 1. Select the scanner: Choose your scanner listed in Devices. DEVONthink will connect with the scanner. If Flatbed is chosen, an overview of the scanning area will be shown. If no document is on the flatbed, add one and press the Overview button to refresh the preview. 2. Set the scanning options: There are a small number of options to choose, many of which will remain as defaults, e.g., the resolution. These are described in the Windows > Sidebar: Image Capture section. However, for a quick reference, here are a few you may change per-document:
3. Load and scan: Put your document on the flatbed or in the document feeder. The press the Start button in DEVONthink's scan window. You should now have your finished document in your chosen location. If you aren't entering a specific name and are scanning to the same location, put in a new document and continue scanning.
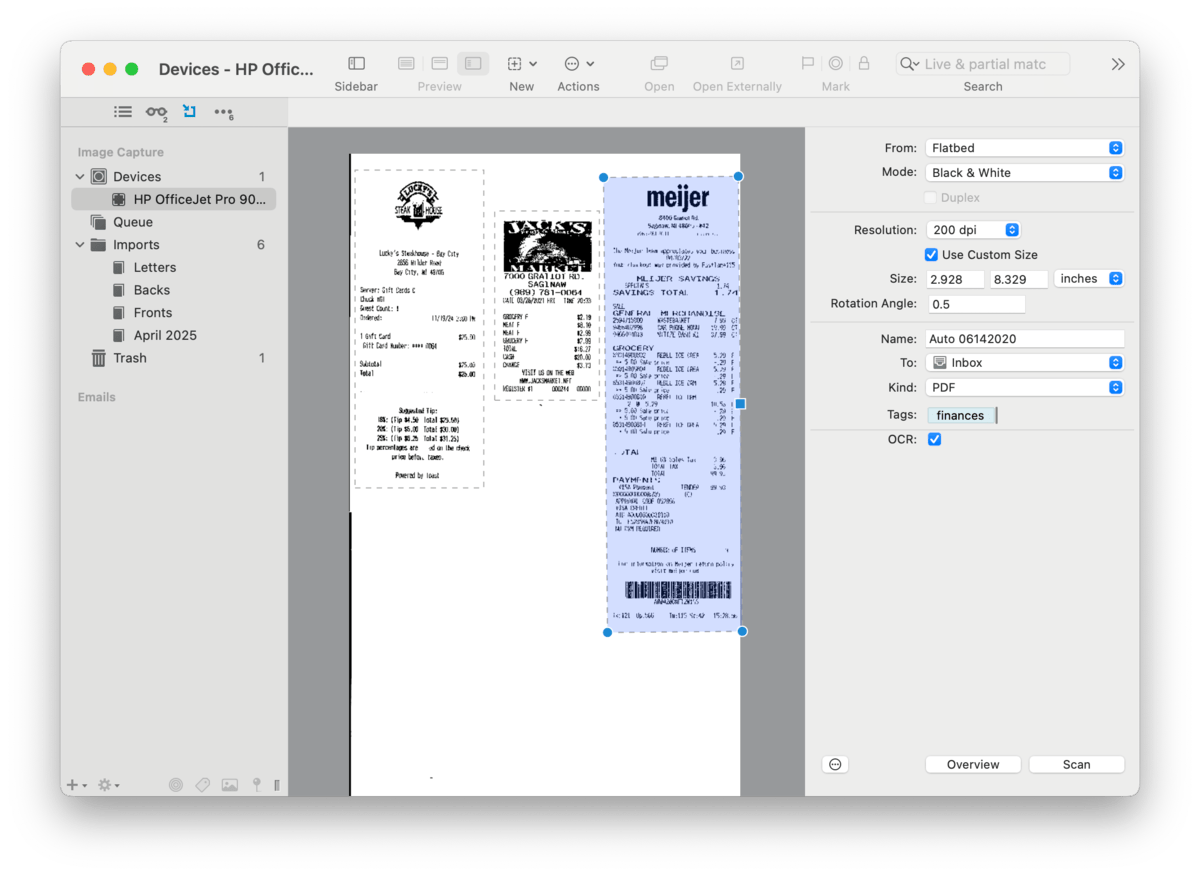
Ganged Scans: A variation on single-page scans is ganged scanning: scanning multiple smaller documents on a flatbed scanner. Imagine you have five receipts from a business night out. Lay them out on the scanner fairly squarely and not overlapping. Enable the Use Custom Size option. Click and drag the handles of the purple overlay to encompass one receipt. Click away from the overlay when it's sized correctly. Now click and drag over the next receipt to add an overlay for it. Continue adding overlays for each individual item on the scanner. When ready, press the Scan button and each will be scanned to individual documents, saved to the destination you chose. Deferred Scanning
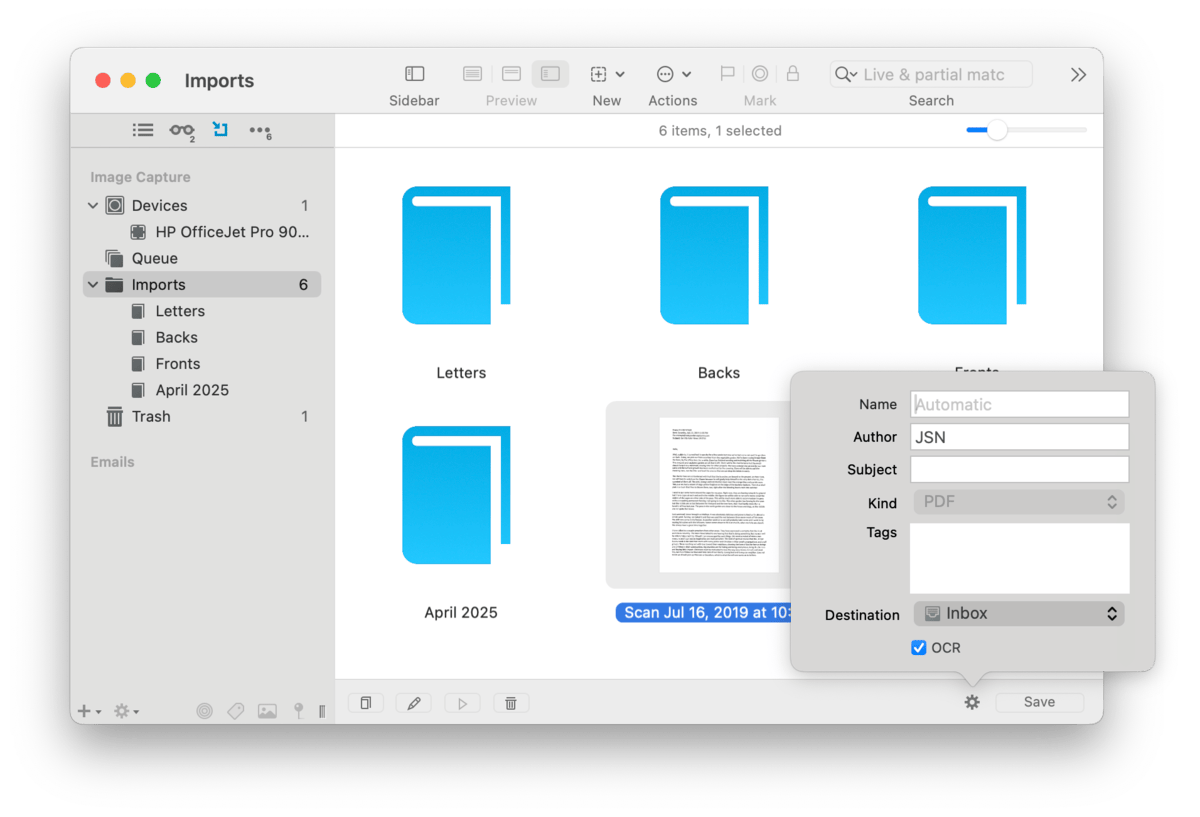
In some scenarios, you may need to scan multiple documents without immediately producing a final PDF. This may be rapid-fire scanning receipts to be collated later. Or you may have a partial set of documents scanned but await the arrival of more to add to a final document. To do this, follow the same steps as multi-page scanning. Binders: A binder in DEVONthink is similar to its real-world counterpart: a temporary holding place for documents. You can choose a binder or create a new one in your scan settings. In the Imports section, select a binder to see the current scans it holds. Within a binder, there are some specific tools for working with the documents:
When you have all your scans in the binder, organized as needed, press the Save button to process it into the finished document. Imports: Scans in the Imports section are ungrouped and can be modified individually. Or select and gather them into an existing binder via drag and drop or into a new binder via the context menu. When you're ready, you can press the Save button to process a loose scan or a binder into a finished document. Multi-page Scans
Many documents are double-sided or have multiple pages that need to be collated into a single document. This requires scanning into a binder you'll save when you're finished scanning pages belonging in one finished document. These steps begin in the same way as single-page scans. 1. Select the scanner: Choose your scanner listed in Devices. DEVONthink will connect with the scanner. If using a flatbed scanner, choose Flatbed and remember you'll have to manually turn over the page to scan the back. If using a document feeder, check Duplex if needed. 2. Set the scanning options: There are a small number of options to choose, many of which will remain as defaults, e.g., the resolution. These are described in the Windows > Sidebar: Image Capture section. However, for a quick reference, here are a few you may change per-document:
3. Select or create a binder: In the To dropdown, choose Create New Binder or choose an existing one. 4. Choose the destination: Set where the final multi-page PDF should be saved. 5. Load and scan: Put your document on the flatbed or in the document feeder. The press the Start button in DEVONthink's scan window. After the page is scanned, you will see a report section appear in the scanner window. This displays the name, the number of scanned pages, the estimated size of the finished document, and the chosen destination. Continue scanning the remaining pages. When done, press the Save button to process and save the final PDF. After a binder is processed, the pages are sent to the scanner's Trash. It's recommended to periodically empty this trash with a quick Control-click then Empty Trash. Queued Scans
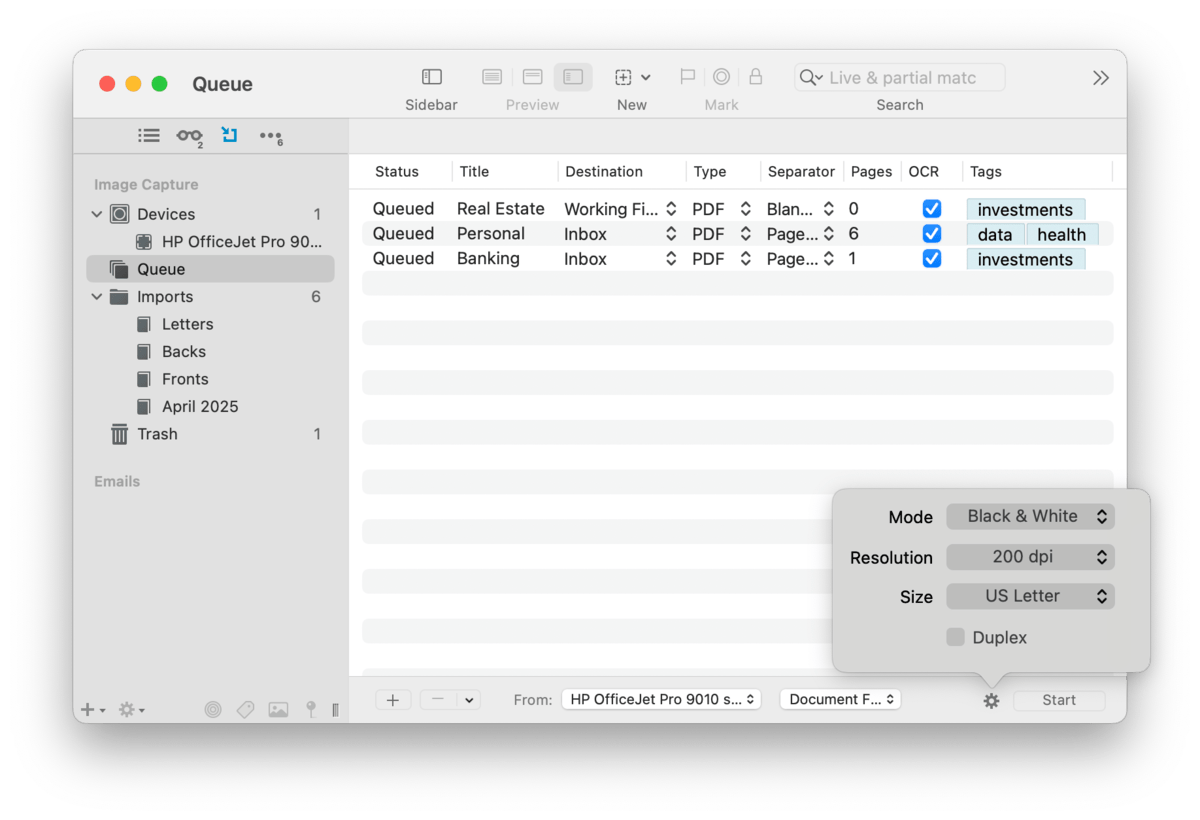
The scanning queue is where you can set up scan jobs to expedite scanning a group of separate documents. Each document, e.g., a twenty page insurance benefits package, is a separate job that will produce a single document. This is used more effectively with scanners having a document feeder. 1. Select the Queue: Instead of selecting the scanner in the Devices, select Queue. 2. Select the scanner: In the dropdown at the bottom of the window, choose your scanner. 3. Select the input type: Choose whether to use the Flatbed or Document Feeder, if available. 4. Set the scanning options: Click the 5. Add a scan job: Click the
6. Load and scan: Now prepare your documents, remembering to insert blank pages between each if you chose the Blank Page separator. Put them in your scanner then press the Start button in DEVONthink's scanning window. Each job will be scanned one after the other until all are finished. Note the queue may pause if there are jobs to process but nothing in the document feeder. Add more documents to it and press Start again. Finished jobs will show in the queue. Press the dropdown next to the minus button and remove sent (processed) jobs or all of them. |