|
Imprints are custom bits of data that can be stamped onto images or the pages of PDF documents. Imprints can be used in a variety of ways, from stamping when an invoice was paid to adding specialized numbering. With the ability to include placeholders, you can create many kinds of watermarks for your documents.
Every imprint is created as a configuration, saved to use again and again. There are three parts to an imprint: the configuration, the appearance, and the location. We'll cover all three here.
Configurations
The Configurations column is where you create a new imprint or edit one you've already created. Select one and edit any of the parts or appearance or use the buttons below this column to create a new one.
-

Add: Click the + to create and name a new configuration.
-
Remove: Click the - button to remove a selected configuration.
-
Action: Select any field and click  for more options, including duplicating, renaming, and deleting the selected configuration. A special item in the menu, New Combined is discussed below.
-
Preview: Click this button to display an example of the imprint with the current settings.
New Combined: Found in the action menu, this option allows you to create new imprints from your existing ones. This extends the usefulness of existing imprints.
From the action menu, select the New Combined option. Two panes will be displayed: Combined and a Configurations panes. In the righthand pane, select an existing configuration and click the < button to add it to the Combined pane in the center. DEVONthink remembers the location and styling of the individual imprints in a combined configuration. To remove an item from the Combined pane, select it and press the > button. It will reappear in the Configurations pane on the right. Combined items will be displayed in the order you add them. To see what the imprint looks like, press the Preview button.
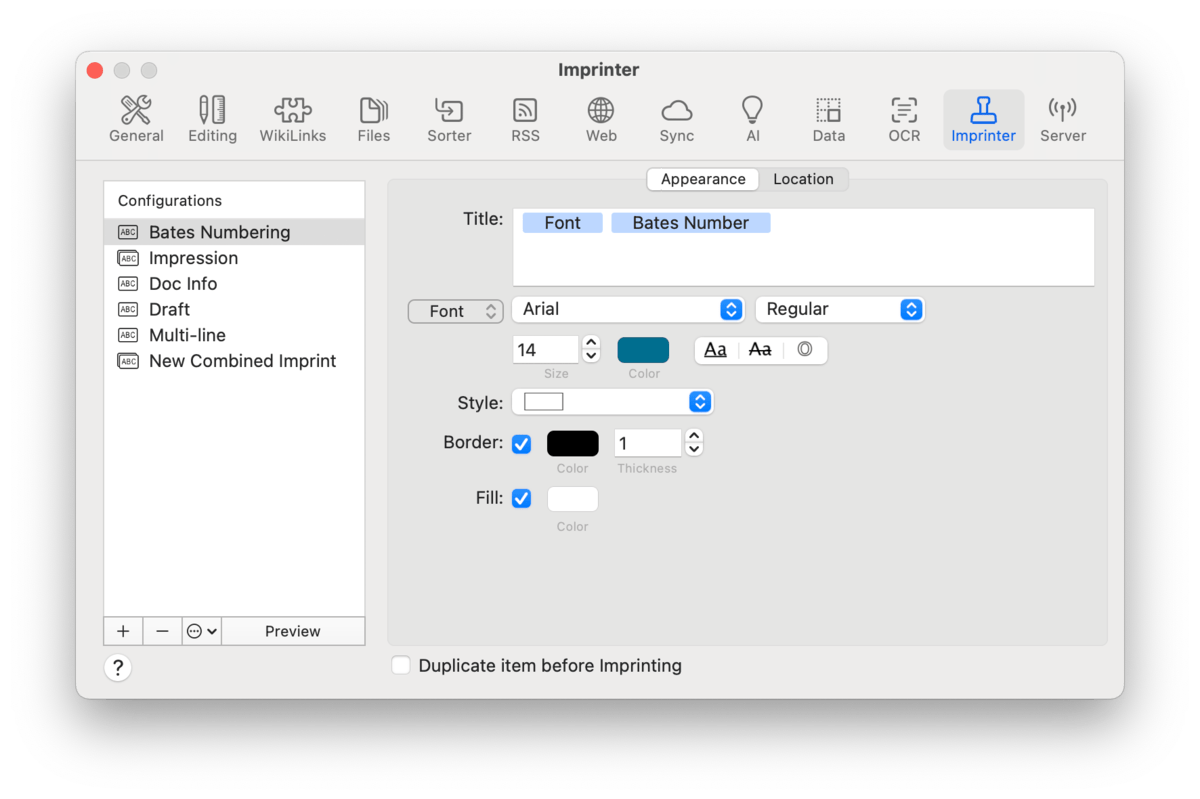
Appearance
Add and style the components of the imprint with these controls.
-
Title: This is the body of the imprint. Type any static text you want to appear in the imprint. Control-click > Insert Placeholder to define sections of the watermark with placeholders. Tabs and linebreaks are also entered as placeholders. If you need to rearrange the parts, you can easily do this via cut and paste.
-
Font: In the Font options, choose the font, weight, color, and other styling for the watermark. If you choose the outline style, you can choose the Thickness of the outline.
-
Border Style: Choose and style a pre-defined border, if desired. When using a border, you can also specify the border Color and Thickness and an optional Fill color.
|
Note:
There is only one font style for each imprint. You cannot have mixed styles, e.g., displaying one word larger or in a different color.
|
Location
In the Location tab, choose and fine-tune the position of the watermark, as well as on what pages it will appear.
-
Position: Set the anchor point for the imprint's location on the document, e.g, clicking the center point centers the imprint horizontally and vertically on the page.
-
Offset X/Y: Fine-tune the position of the watermark. Negative values are to the left (X) and down (Y), positive values are to the right (X) and up (Y), relative to the anchor point of the imprint.
-
Rotate: Set your imprint on an angle, if desired.
-
Occurrence: Choose what pages the imprint should appear on. Use Custom to have the imprint appear on specific pages.
|
Note:
Be aware imprints currently cannot be removed from the document. Especially while you're fine-tuning your imprint, it's a good idea to enable Duplicate item before imprinting. This will imprint a copy of the current document.
|
|