|
|
Sync: Webdav |
|
We often get requests about supporting other cloud services, e.g., OneDrive. However, it's no trivial task to add and support more and more services. To open up sync opportunities, DEVONthink supports WebDAV, a well-known file transfer technology used by many companies, universities, and individuals across the globe. Cloud services: If you want to explore the options, you can find lists of WebDAV providers online. One we specifically support is a European cloud service, CloudMe. Rolling your own: It is also possible to run a WebDAV server on your own. Some NAS drives, e.g., Synology, have WebDAV capabilities and you can run a WebDAV server by repurposing an older Mac. Even some more full-featured packages like OwnCloud or NextCloud can be set up for WebDAV services. However, these options can provide more technical challenges in setup and administration beyond the scope of our support. Check the manufacturer or service's support pages for information on setting up a WebDAV server. For some, setting up a WebDAV server may be too daunting a task but it's possible to run one directly on your Mac. While we don't develop or offer support for it, this application lets you set up a simple WebDAV server on a Mac: WebDAVNav Server. Choose a folder for your sync store, set up credentials, set up security with a certificate, then start the server. This would be ideal on an always-on Mac mini, but could be used on any Mac. One technical note: When using this application, you do not need to include the folder path in the URL of the sync setup. Technical Considerations Remember WebDAV is a server, so connecting to it is just like connecting to a website using its web address, its URL. And similar to websites that require you to log in with user credentials. URL: In order to connect to a WebDAV server, you need to its URL. The appropriate URL is something you need to get from the cloud service or manufacturer's documentation. For a commercial service, the URL likely is simple. If you're running your own server, it may be more extended.
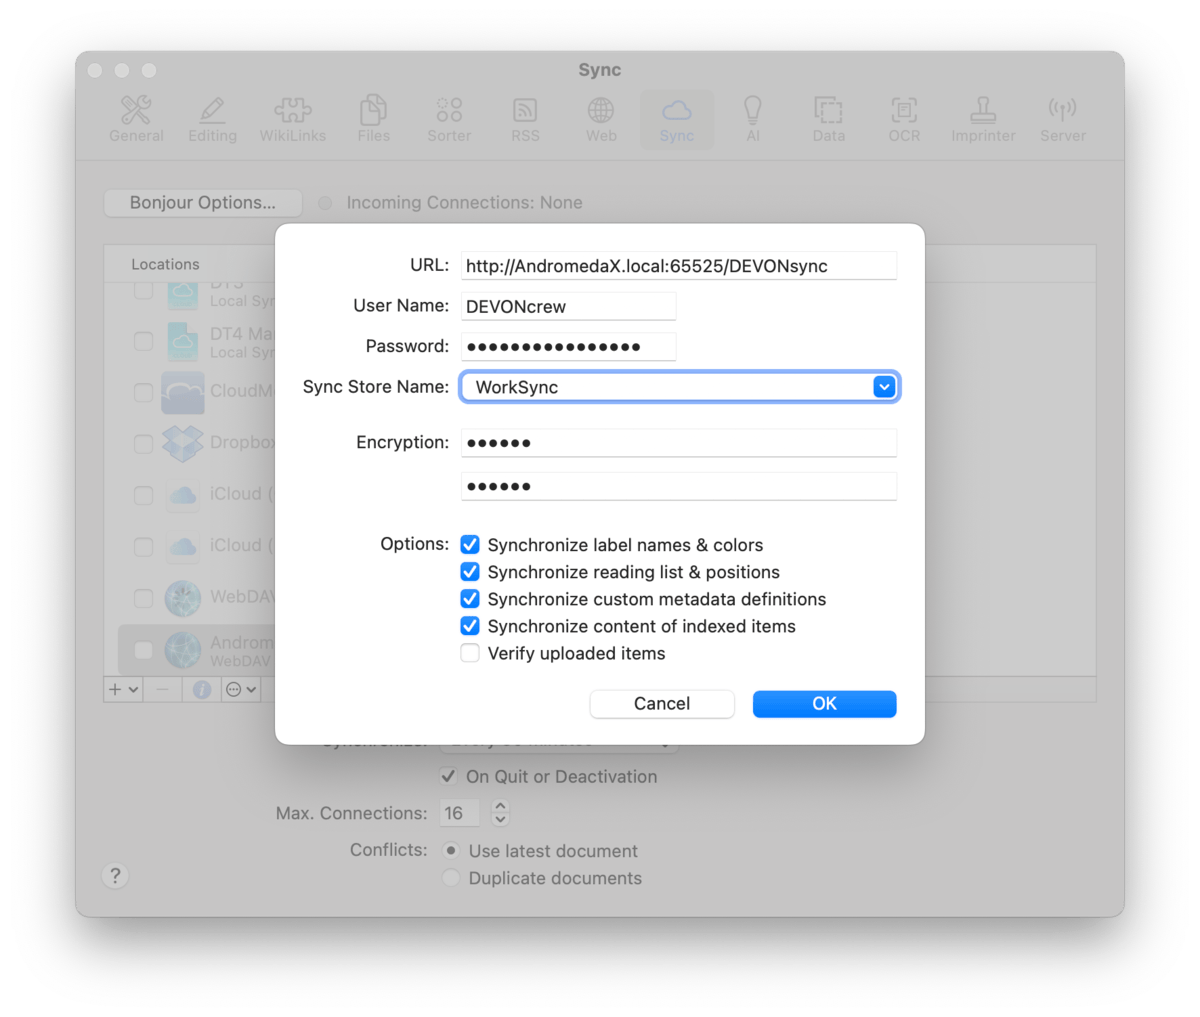
So your URL could look similar to: Credentials: In order to log into the server, you will need to enter your Username and Password. Remote Access: If you're running your own WebDAV server, accessing and syncing to it on your local network is trivial. However, access it from outside you're network will require instruction beyond the scope of our help. Check the documentation for the device to see how to set it up. Setup Setting up and using a WebDAV sync requires entering the address of the server, your login credentials, and specifying or choosing a sync store. On the first Mac… Setup a new WebDAV sync:
On a second Mac, the setup is almost the same but you'll be choosing an existing sync store. Remember: you will be adding an existing sync location, not creating a new one. Setup an existing WebDAV sync:
|