|
Bonjour (also called a direct connection) is technology you are almost certainly already acquainted with. If you have a wireless printer or scanner and notice how your Macs and mobile devices can see those devices by name with no setup by you, they are using Bonjour. Bonjour is a way for devices, or services like DEVONthink's sync, to broadcast its presence on a network without requiring technical know-how by the user.
A Bonjour sync is a direct connection between devices. One device acts as a server, the other a client to that server. There is no intermediary location where data is stored. This is much faster than uploading all data to some server on the internet and downloading it again on another device. It is also much more private since your data remains in your control at all times.
Technical Considerations
A Bonjour sync is simple but these things need to be considered first:
-

The devices must be on the same local network, noting it will not work over VPN.
-
You must be on your own network or one that allows Bonjour traffic or non-standard ports. Public, corporate, and academic networks sometimes disallows these.
-
If you're running a firewall or network monitoring software like Little Snitch, you must add exceptions for DEVONthink's traffic.
-
The devices, one acting as the Bonjour server, the other as the Bonjour client, must be on and running DEVONthink or DEVONthink To Go, with the sync databases open.
-
There must be only one device acting as the Bonjour server for a set of databases. If you enable it on one Mac, you should not be enabling it on another device, neither Mac or mobile.
-
Our applications must have local network access, mandated by Apple. On macOS Sequoia, you must enable DEVONthink in System Settings > Privacy & Security > Local Network. On iOS/iPadOS, enable DEVONthink in Settings > Privacy & Security > Local Network.
Setup
In a typical Bonjour setup, the most active Mac is the Bonjour server. For the smoothest process, this is also where you will make new databases, when needed. Here is how to set up the server and a client Mac.
Setting up the server Mac:
-
Step 1: Open DEVONthink's
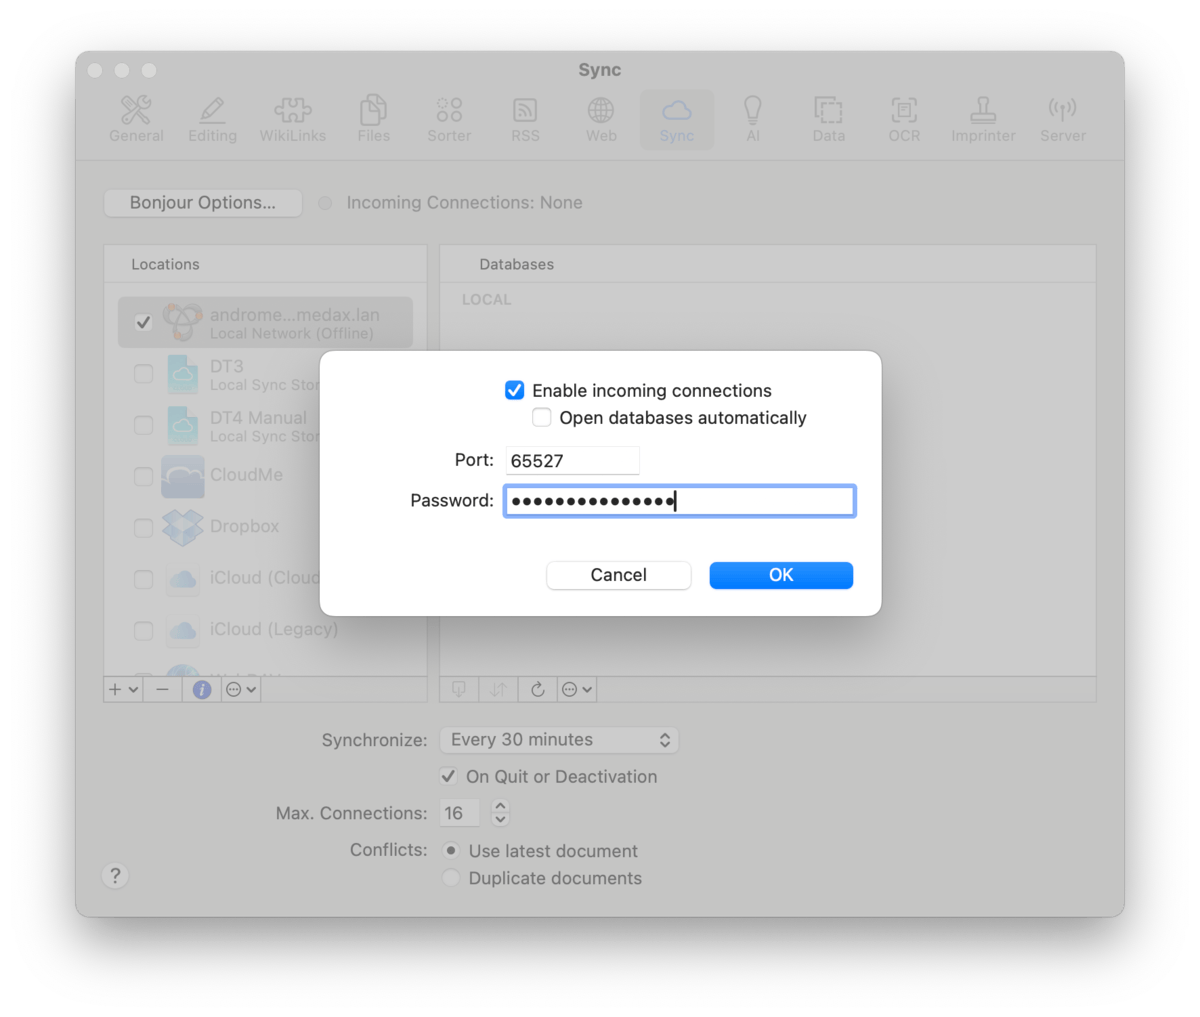
Sync settings and click the Bonjour Options button.
-
Step 2: Check Enable Incoming Connections.
-
Step 3: If you have a known port to assign, enter it in the Port field. Otherwise, leave it empty and an unused one will be assigned at launch.
-
Step 4: Enter a mandatory Password, used to authenticate client devices.
-
Step 5: Leave DEVONthink running and awake.
Setting up a client Mac:
-
Step 1: Open DEVONthink's Sync settings. In the Locations list, you should see the server Mac available as a sync location.
-
Step 2: Enable the checkbox next to the server Mac and enter the Bonjour password you specified. If entered incorrectly, you will be prompted to enter it again. If entered correctly, the sync location will become active.
-
Step 3: Select the sync location. In the Databases list on the right, you will see databases that are open on both devices, e.g., ones you copied over manually. In the Remote section, you will see databases that either aren't open or haven't been imported.
-
Step 4: If you have a matching Local database, check the checkbox to merge with the server Mac's copy. Repeat with others as needed.
-
Step 5: If you need to import a remote database, Control-click it in the Remote section and choose the appropriate import option, ideally saving to the ~/Databases directory. Repeat this step as needed.
You are now syncing a local copy of the database between the two Macs, with changes made on either propagating to the other.
|